Friday, November 26, 2010

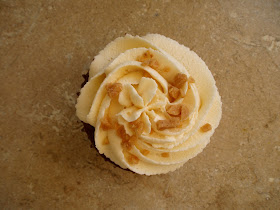
Cupcakes for Movember! Chocolate Cupcakes with Caramel Buttercream


For the second year in a row, my fiance is growing a moustache as a part of the Movember movement. Movember occurs over the month of November, and men across the world grow moustaches and raise both funds and awareness for prostate cancer.  Both "Mo Bros" and "Mo Sistas" get involved for this great cause.


If you would like more information about Movember, here is a link to their 'about' page. Please check it out!


In order to help him raise funds, I baked some cupcakes to send to his work so that people could make a donation and receive a cupcake as thanks!


My fiance picked Devil's Food Cupcakes (his favourite) and requested a caramel icing.  Since I didn't have a recipe on hand for caramel icing, I decided to jump in and give it a shot. And you know what? It turned out delicious! I also topped the cupcakes with skor bits, awesome.


This recipe is enough to frost 36 cupcakes, so you may want to cut it down if you are making a standard batch of 12 or 24 cupcakes.


Caramel Buttercream

  • 20 caramel squares (I used Kraft Caramels)
  • 2 tbsp milk
  • 1 1/2 cups butter or margarine, room temperature
  • 5 to 6 cups icing sugar (I used about 5 1/2 cups)
  • 1 tsp vanilla
  • extra milk or water if the icing is too thick
  1. Unwrap the caramel squares and place them in a microwave-safe bowl with the 2 tbsp of milk
  2. Microwave for 30 second intervals, mixing in between each interval, until smooth
  3. Place in the fridge or freezer to bring it to room temperature, stirring occasionally
  4. After the caramel has come to room temperature, beat it with the butter until well mixed
  5. Add the icing sugar one cup at a time, mixing well after each addition
  6. Add the vanilla and beat until light and fluffy
  7. If the icing is too thick, you can add a teaspoon of milk or water at a time until the desired consistency is reached (I added another 2 teaspoons of milk)
  8. Or, if the icing is too thin, you can add icing sugar 1/2 cup at a time until the desired consistency is reached
  9. Enjoy!

Thursday, November 25, 2010

Whole Wheat Lemon Almond Biscotti


This was my second time making biscotti, and I got lucky. These turned out just as tasty as my Chocolate Pistachio Biscotti!  These are much larger than the chocolate pistachio cookies, and are perfect with a glass of hot chocolate on these chilly winter days.


The logs rose into each other while baking on my large cookie sheet, so I would recommend putting each log on a separate baking sheet in order to avoid this.


Also, next time I make these I think that I might try putting even more lemon zest in the biscotti.  This is simply a personal preference, likely due to my love of anything citrus!


I originally found this recipe on marthastewart.com, and it made about 3 and a half dozen cookies.


Whole Wheat Lemon Almond Biscotti
  • 1 3/4 cups flour
  • 1 1/2 cups whole wheat flour
  • 1 1/2 tsp baking powder
  • 1/2 cup butter or margarine, room temperature
  • 1 1/4 cups sugar
  • 1/3 cup liquid honey
  • 1 tbsp grated lemon zest
  • 3/4 tsp salt
  • 3 eggs
  • 1 tbsp vanilla
  • 1 tbsp almond extract
  • 1 cup almonds
  1. Whisk together the regular flour, whole wheat flour, and baking powder in a bowl
  2. In a second bowl, beat together the butter, sugar, honey, lemon zest, and salt until fluffy
  3. Add the eggs to the sugar mixture one at a time, making sure each is well mixed in
  4. Add the vanilla and the almond extract and mix well
  5. Add 1/3 of the flour mixture to the butter/sugar mixture at a time, mixing well each time
  6. After all flour is added, fold in the almonds
  7. Cover the dough with plastic wrap, and place in the refrigerator for about one hour
  8. Divide dough in half, and roll each half into a 2" x 15" log
  9. Place each log on a cookie sheet lined with parchment paper
  10. Place cookie sheets with the biscotti dough in the refrigerator for half an hour
  11. Preheat the oven to 325 F
  12. Place both baking sheets in the oven, and bake for 35 minutes, or until the two logs are golden and firm on the edges
  13. Remove from the oven, reduce heat to 300 F, and  let logs cool for about 20 to 30 minutes
  14. Slice logs width-wise into 1/2" thick slices and lay each cookie back onto the parchment lined cookie sheets
  15. Bake for about 30 to 40 minutes, or until golden
  16. Enjoy with your favourite warm beverage!
Brrr, I guess the snow is here to stay!

Tuesday, November 23, 2010

Haystacks


Haystacks are a type of cookie that my family has been making as long as I can possibly remember.  They are a delicious drop cookie that is really quick to make, and makes a large batch (which is necessary when these are around!).


These are very sweet, but so tasty! This recipe makes about 3 1/2 to 4 dozen cookies.


Haystacks
  • 2 cups sugar
  • 1/3 cup cocoa
  • 1/2 cup butter or margarine
  • 1/2 cup milk
  • 3 1/2 cups rolled oats
  • 1 cup flaked coconut
  • 1/2 tsp vanilla
  1. In a large pot, place the sugar, cocoa, butter (or margarine) and milk
  2. Bring the first four ingredients to a boil over medium heat
  3. Allow the mixture to boil for 1 minute, then remove from heat
  4. Mix in the rolled oats, coconut, and vanilla
  5. Drop by heaping spoon-fulls onto waxed paper
  6. Let set, and enjoy!
The stack of cookies that were sent to the bake sale!

Monday, November 22, 2010

Shortbread Cookies


Another classic cookie for the Christmas season is the delicious Shortbread Cookie!  These are super easy to make; they actually only have 4 ingredients.


I love these cookies! You can either make them as I have by rolling them into a ball and then pressing them down with a fork, or you can roll out the dough and cut fun shapes with cookie cutters.  


This recipe has been around as long as I can remember, it makes the perfect Shortbread Cookies. I doubled this recipe and made about 4 1/2 dozen cookies, so this original recipe will make about 2 dozen cookies.


Shortbread Cookies
  • 1/2 cup corn starch
  • 1/2 cup icing sugar
  • 1 cup flour
  • 3/4 cup butter or margarine (room temperature)
  1. Preheat oven to 300F and line a couple cookie sheets with parchment paper
  2. Whisk or sift together the corn starch, icing sugar, and flour
  3. Blend in the butter until a soft, smooth dough forms
  4. Roll into balls about 1" to 1 1/3" in diameter and place on prepared cookie sheets, a couple of inches apart
  5. Dip a fork into some flour, and gently press down on the balls of cookie dough
  6. Decorate with sprinkles if you like, then bake for 15 to 20 minutes or until the edges are slightly brown
  7. Enjoy!

Saturday, November 20, 2010

Chocolate Cookie Cutouts


I also made these tasty chocolate cookies for the bake sale fundraiser this last week.  They are a rich, chocolatey cookie, and they aren't very sweet at all.  I drizzled them with white chocolate for a quick and easy decoration, and to add a touch of sweetness to them as well.


I really enjoyed these cookies, the fact that they weren't incredible sweet was such a nice change for a cookie! That may be why I am also enjoying biscotti so much lately.


This recipe is from Martha Stewart's Cookies, and I made 4 dozen cookies out of one batch.


Chocolate Cookie Cutouts
  • 1 1/2 cups flour
  • 1/2 cup plus 2 tbsp cocoa powder
  • 1/8 tsp salt
  • 1/4 tsp cinnamon
  • 3/4 cup (1 1/2 sticks) butter or margarine
  • 1 1/2 cups icing sugar
  • 1 egg
  • 1/2 tsp vanilla
  1. Whisk together the flour, cocoa, salt, and cinnamon
  2. Beat together the butter and the icing sugar until light and fluffy
  3. Add the egg and vanilla to the butter mixture, and mix well
  4. Add the dry ingredients to the wet ingredients, and mix thoroughly
  5. Wrap the dough in plastic wrap and place in the fridge for a minimum of 1 hour (this can be made and refrigerated overnight)
  6. Flour a piece of parchment paper, and then roll out the dough (1/8 to 1/4 inch thick)
  7. Place the rolled out dough (on the parchment paper) into the freezer for about 15 minutes to set
  8. Preheat your oven to 350 F, and line a few cookie sheets with parchment paper
  9. Cut out your cookies from the dough using whichever cookie cutters you like (I used a star, a tree, and a candy cane shape)
  10. Place the cookies on the prepared baking sheets, and then place them back in the freezer for about 15 minutes (this will help set the dough and ensure that they keep their crisp shape while baking)
  11. Bake until the edges are dry, about 8 minutes
  12. Let them cool, and then decorate with whatever you like!
  13. Enjoy!
Note: If you would like to decorate them as I have, place some white chocolate candy melts (or white chocolate chips) in a sandwich bag.  Microwave at 30 second intervals, massaging the bag between each interval. When the chocolate is completely melted, snip off a corner of the bag and drizzle away!


Is anyone else having trouble with blogger? I cannot seem to control my font size today!

Thursday, November 18, 2010

Gingersnap Cookies


This past Sunday I spent the whole day baking all different kinds of cookies in preparation for the silent auction and bake sale that we were having at my work.  It is an awesome fundraiser that they have had every November for about 7 years now.  All funds that are raised go straight to the Cross Cancer Institute so that families currently undergoing treatment can buy food and gifts for Christmas!  


This year I donated cookies for the bake sale, and I made two tins of cookies to be added to the silent auction. 


The first type of cookies that I made were Gingersnap Cookies.  To me, these cookies mean it is the holiday season! They make the whole house smell delicious, and are really amazing cookies.  


I hope you love them as much as I do!  I made about 4 dozen cookies from this recipe.


Gingersnap Cookies

  • 3/4 cup margarine
  • 1 cup sugar
  • 1/4 cup molasses
  • 1 egg
  • 2 cups flour
  • 2 tsp baking soda
  • 1 tsp ginger
  • 1 tsp cinnamon
  • 1 tsp cloves
  • 3/4 cup sugar to roll the dough in
  1. In a medium bowl, cream together the margarine, 1 cup of sugar, egg, and molasses until smooth
  2. In a second bowl, whisk together the flour, baking soda, ginger, cinnamon, and cloves
  3. Add the dry ingredients to the wet and mix until a smooth dough forms
  4. Form two balls with the dough, and place them in a bowl in the fridge for about 30 minutes
  5. After the dough has chilled, remove one ball of dough and preheat the oven to 350 F
  6. Fill a bowl with the 3/4 cup sugar, and line your cookie sheets with parchment paper
  7. Roll small balls of dough (about 1 inches in diameter) and drop them into the bowl of sugar
  8. When you have about 6 cookie dough balls in the sugar, roll them around to completely coat them in the sugar and then place them on a prepared cookie sheet
  9. Repeat until all dough has been rolled and placed on the cookie sheets. I fit 12 to 15 cookies per sheet
  10. Repeat the process with the remaining large ball of dough that is still in the refrigerator
  11. Bake cookies for 10 - 12 minutes, or until the edges are firm
  12. Let cool, and enjoy with a glass of milk or tea!
Note: These cookies freeze really well when wrapped in plastic wrap and then placed in a freezer bag.


Wednesday, November 17, 2010

Lemon Cupcakes for a Baby Shower


This past weekend was a busy one! In addition to the cupcake pick-up and making a ton of cookies for our silent auction/bake sale fundraiser at work, I also had an order for 3 dozen mini lemon cupcakes for a baby shower.


This recipe for lemon cupcakes is by far my favourite lemon cupcake recipe! It is so moist and flavourful, I would eat them for every meal if I could get away with it.  Also, these cupcakes are amazing naked, they just have so much flavour and such an amazing texture all on their own!


The colour theme for the baby shower was pink and yellow, so I baked half in yellow cupcake liners, and half in pink.  I then tinted some vanilla buttercream yellow and pink, and finished off the mini's.


They were kind enough to send me some pictures of the cupcakes on the treat table, how nice are they? And what an amazing dessert table!


This recipe is from Martha Stewart's Cupcakes, and is delicious! This recipe makes about 20 regular cupcakes.


Lemon Cupcakes

  • 1 3/4 cup flour
  • 1 tbsp lemon zest (approx. 2 lemons)
  • 1 tbsp lemon juice (approx. 2 lemons)
  • 1/4 tsp baking powder
  • 3/4 tsp salt
  • 1 3/4 sticks butter or margarine (3/4 cup plus 2 tbsp or 14 tbsp)
  • 1 1/2 cups sugar
  • 1/2 stick cream cheese (4 ounces or 125 g)
  • 4 eggs
  • 1 tsp vanilla
  1. Preheat oven to 325 F and line your muffin tins with cupcake liners
  2. In a medium bowl, whisk together the flour, lemon zest, baking powder, and salt
  3. In a second bowl, beat together the butter and sugar until fluffy
  4. Add the cream cheese to the butter mixture and mix well
  5. Add the eggs to the butter mixture one at a time until very well mixed
  6. Pour in the lemon juice and the vanilla to the butter mixture and mix
  7. Add the flour mixture a bit at a time, until all flour has been added
  8. Fill the cupcake cups, and bake for 25 - 28 minutes for regular cupcakes, or 10 - 14 minutes for mini cupcakes
  9. The cupcakes are done when a toothpick comes out clean when inserted into the center of a cupcake
  10. Top with your favourite frosting
  11. Enjoy!
Note: These cupcakes also freeze really well if you freeze them without any frosting on them.


Tuesday, November 16, 2010

Cupcake Pick-Up


A couple of weeks ago I gave one of my girlfriends two gift certificates for cupcakes to put in her silent auction for her skating team.  Since cupcakes are so popular, we though they would be a fun item for people to bid on.  


I actually have no idea how much each gift certificate went for, but people did bid on them!  How exciting is that?


This past weekend someone called in to redeem their gift certificate, so I made one dozen chocolate cupcakes and one dozen vanilla cupcakes for them.  Then I topped everything off with some vanilla buttercream, and rainbow nonpareils! 


No matter how many awesome sprinkles I come across, the rainbow nonpareils are always my favourite.  


I hope they enjoyed their cupcakes!


Saturday, November 13, 2010

Peppermint Icing


I had decided to make Peppermint Icing to top my chocolate cupcakes after buying some neat Christmas sprinkles. The icing turned out really well and tasted great with the cupcakes, but I think that the next time I make this icing for a Christmas cupcake, I will mix in some crushed candy canes for some nice colour and texture!


I decorated my cupcakes with my new little gingerbread man sprinkles


silver candy beads


and classic green & red jimmies!


I used my basic vanilla buttercream recipe, and substituted most of the vanilla for peppermint extract.  This recipe was enough to decorate 24 regular cupcakes.


Peppermint Icing
  • 1 cup (2 sticks) butter or margarine, room temperature
  • 1/2 tsp vanilla
  • 1 1/2 tsp peppermint extract
  • 4 cups icing sugar
  • 2 tsp to 2 tbsp milk 
  1. Beat the butter (or margarine) until pale and fluffy
  2. Add the vanilla and the peppermint extract, and mix well
  3. Add the icing sugar 1 cup at a time, making sure the icing is smooth before adding the next cup of icing sugar
  4. After all of the icing sugar is incorporated, beat in the milk one teaspoon at a time until the desired consistency is reached (I used about 3 tsp for these cupcakes)
  5. Enjoy!

Friday, November 12, 2010

Chocolate Cupcakes (with Peppermint Icing)


Since Halloween and Thanksgiving are now finished for the year, it is pretty clear as you walk around that we are well into the Christmas season!  We may not have snow (yet, but maybe this weekend!), but everywhere you look the Christmas decorations and displays are already going up.


I found some awesome Christmas sprinkles when I was shopping last weekend, so I decided to try a new chocolate cupcake recipe from www.theavidappetite.com and pair it with some candy-cane inspired peppermint icing.  I believe that this cupcake recipe was originally adapted from an Ina Garten recipe.


These cupcakes are a bit richer than the other chocolate cupcake recipes I have made, but I really enjoyed them.  The batter was a really neat texture (very light and fluffy) and as a result it produced some very fluffy and delicious cupcakes.


There is a little bit more work involved in these cupcakes than is required for most chocolate cupcake recipes (like my vegan chocolate cupcakeschocolate mint cupcakes, or my devil's food cupcakes), but if you have the time, definitely give these a shot.  This recipe makes 24 regular cupcakes.


Chocolate Cupcakes
  • 3/4 cup butter or margarine, softened (1 1/2 sticks)
  • 2/3 cup sugar
  • 2/3 cup brown sugar, packed
  • 2 eggs
  • 2 tsp vanilla
  • 1 cup buttermilk
  • 1/2 cup sour cream
  • 2 tbsp coffee, cooled
  • 1 3/4 cup flour
  • 1 cup cocoa
  • 1 1/2 tsp baking soda
  • 1/2 tsp salt
  1. Preheat the oven to 350 F and line your muffin tins with cupcake liners
  2. Cream together the butter, sugar, and brown sugar until very light and fluffy
  3. In a second bowl, whisk together the buttermilk, sour cream, and coffee
  4. In a third bowl, whisk together the flour, cocoa, baking soda and salt
  5. Add the eggs (one at a time) to the butter/sugar mixture and beat until well mixed
  6. Add the vanilla to the butter/sugar mixture and mix well
  7. Add 1/3 of the buttermilk mixture to the butter/sugar, followed by 1/3 of the flour mixture
  8. Repeat until everything has been added together, and mix until just combined
  9. Spoon the batter into the cupcake cups, and bake for 20 to 25 minutes, or until a toothpick comes out clean when inserted into the centre of a cupcake
  10. Let the cupcakes cool completely before frosting with your favourite frosting
  11. Enjoy!

Thursday, November 11, 2010

Maple Bacon Kettle Corn


Do you ever have that moment where you come across a recipe somewhere, and know that you will make it that same day, simply because you have to make it as soon as humanly possible?  Regardless of whether you have the ingredients on hand, or of the fact that your refrigerator is currently bursting with delicious leftovers from the last week?


Stumbling upon this recipe on joythebaker.com produced one of those moments for me. 


I mean, bacon? maple? popcorn?!?! How could I not make this recipe is the real question here.


So I did, and it was worth it.  I am already trying to find an excuse to make it again.


Next time you are having a movie night, or decide to exercise your right as an adult to have popcorn and wine for supper, make this!


This recipe makes a large bowl of kettle corn, so you might want to half it if you are just making it for one or two people.


Maple Bacon Kettle Corn

  • 8 slices of bacon
  • 2 tbsp maple syrup
  • 1/2 cup corn kernels
  • 1/4 cup oil (use the grease from the bacon, and top up with vegetable oil to make 1/4 cup)
  • 3 tbsp sugar
  • 1 to 2 tsp salt (depends on how much salt you like in your kettle corn)
  1. Cook the bacon in a frying pan until crispy
  2. Remove bacon and place on a paper towel to remove excess grease
  3. (Carefully!) pour the bacon grease into a measuring cup, and add vegetable oil until you have 1/4 cup of oil
  4. In a large pot, pour in the oil/grease and sprinkle in the corn kernels
  5. Top with sugar and salt, then cover with a lid
  6. Turn on the burner to medium-high, and start shaking the pot when you hear the first kernel pop. Keep shaking often to ensure that none of the popcorn or sugar burns
  7. While the grease/oil is heating up, cut up the bacon into small pieces and mix with the maple syrup
  8. When popcorn is done, quickly (and carefully! hot sugar produces painful burns!) pour the popcorn into a large bowl
  9. Give it a quick stir, then pour in the maple syrup/bacon mixture and stir until well mixed
  10. Feel free to add more salt if you wish at this point
  11. Enjoy!

Wednesday, November 10, 2010

Halloween Cupcakes 2


I realize that we are well into November by now, but I really wanted to share some other cupcakes I had made for my sister's Halloween party.  


These are red velvet cupcakes with a vanilla buttercream icing, and awesome Halloween sprinkles. 


Swirls and sprinkles, they just make you smile!


Tuesday, November 9, 2010

Chocolate Pistachio Biscotti


Ever since I tried biscotti for the first time last year (yes, it took me that long!) I have been meaning to make it myself at home.  I loved not only the taste, but how perfect they are when paired with a nice hot drink on a cold night.


When I went to the grocery store to pick up the things I needed, I scoured the aisles for shelled unsalted pistachios, but no luck.  I could have just picked another type of nut, or made a different kid of biscotti, but I already had the visions of delicious chocolate pistachio biscotti floating around in my head. I was committed!  


So instead I bought shelled unsalted pistachios, and shelled each and every pistachio with love, and raw fingers.


But you know what? Totally worth every broken nail. 


These are absolutely delicious, and make a fantastic snack with a hot beverage.  I drizzled mine with white chocolate which added a nice touch of extra sweetness, but these are also fantastic without it.


The original recipe is from marthastewart.com, and made about 32 cookies.


Chocolate Pistachio Biscotti

  • 2 cups flour
  • 3/4 cup sugar plus 2 tbsp set aside
  • 1 1/2 tsp baking powder
  • 1/4 tsp salt
  • 3/4 cup shelled unsalted pistachios
  • 4 ounces dark chocolate, chopped (or dark chocolate chips)
  • 3 eggs
  • 2 tbsp butter or margarine, melted
  • 1 tsp vanilla
  • 1/4 cup cocoa
  1. Preheat oven to 350 F and line a cookie sheet with parchment paper
  2. In a large mixing bowl whisk together the flour, 3/4 cup sugar, baking powder, and salt
  3. Add the pistachios and the chopped chocolate (or chocolate chips) and mix well
  4. In a second bowl, whisk together the eggs, melted butter, vanilla and cocoa until smooth
  5. Pour the wet ingredients into the dry and mix until well combined 
    1. Note: the dough will be quite dry, so it will take a little while to come together
  6. Sprinkle 1 tbsp of sugar on the parchment paper
  7. Split the dough in half, and form each half into a 2 1/2 inch X 12 inch log
  8. Place each log on the prepared baking sheet (they will both fit on one sheet), and sprinkle each with 1/2 tbsp sugar
  9. Bake until firm, about 15 to 20 minutes
  10. Remove from oven, and let cool completely (about 20 to 30 minutes)
  11. Set the oven to 300 F and prepare a second cookie sheet lined with parchment paper
  12. Cut each log into 1/2 inch thick slices (I had about 16 slices/cookies per log) and lay them out onto the parchment paper
  13. Bake at 300 for 15 to 20 minutes, or until the cookies are dry
  14. Let the biscotti cool completely
  15. Drizzle with white chocolate if you wish, and Enjoy!